Thursday, September 6, 2012
PTU Marry The Night
Tutorial written by ©Stephanie Spriggs aka Stefani for use on http://swaggabystefani.blogspot.com. Any similarity to another tutorial is purely coincidental and unintentional. Please do NOT claim as your own. My tutorials are for personal use only, please do not use them for monetary gain. If you wish to share my tutorial please contact me at swaggabystefani@gmail.com first to obtain permission.
Supplies Needed
New release from Foto Retro “Alana” available at Artistic Reality Talent on 9/7
PTU “Marry The Night” By KillerKitty Scraps
WSL_Mask221 available here
Font “Broken Ghost” at dafont.com
Open Paper 4
Resize to 600x600
Layers>Load/Save Mask
Load Mask from disk
WSL_Mask221
Merge group
Open Sparkles
Resize to 600x530
Copy>Paste as New Layer
Add drop shadow
Copy>Paste tube
Resize by 75%
Position tube to far right
Add drop shadow
Position sparkle layer to look like its wrapping around tube
Selections>Float>Defloat tube
On sparkle layer delete areas to give the effect of it swirling around tube
Copy>Paste Broken Glass
Resize by 75%
Add drop shadow
Open Cat1 and Cat2
Resize both by 50%
Place Cat1 by tubes feet
Cat2 to the right of the tag
Add drop shadow to both
Open Moongem 1
Resize by 50%
Flip Vertical and Horizontal
Copy>Paste
Position top right
Add drop shadow
Add Credits
Add Name
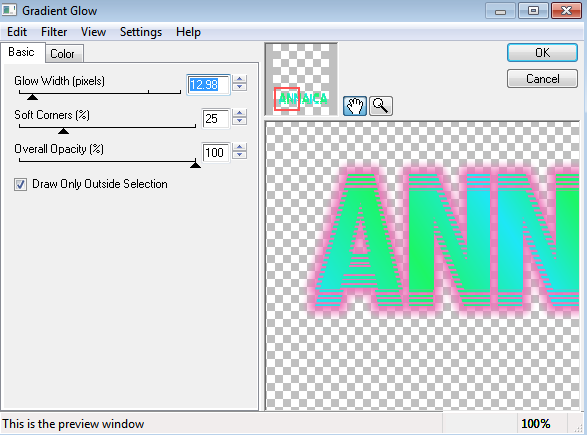
Add Gradient Glow at 8
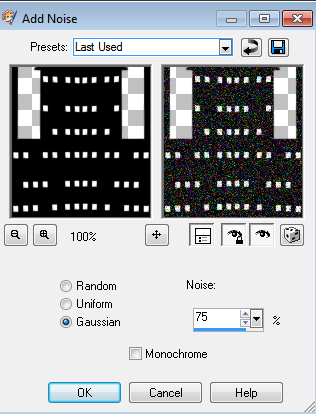
Add Noise 80% Uniform Monochrome Checked
Thursday, August 30, 2012
PTU EDC Tutorial
Tutorial written by ©Stephanie Spriggs aka Stefani for use on http://swaggabystefani.blogspot.com. Any similarity to another tutorial is purely coincidental and unintentional. Please do NOT claim as your own. My tutorials are for personal use only, please do not use them for monetary gain. If you wish to share my tutorial please contact me at swaggabystefani@gmail.com first to obtain permission.
Supplies Needed
PTU Kit “Funky Music” by Abstract Creations available at Artistic Reality Talent
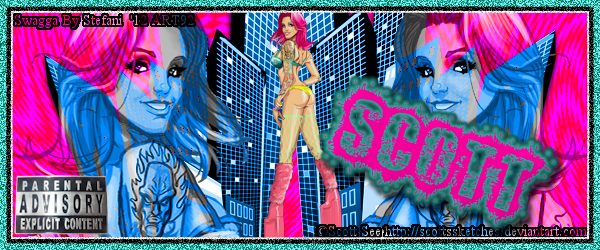
“EDC” by Scott See You need a license with Artistic Reality Talent to use his work. Tube available here
DBSflux>Bright Noise available here
Eyecandy 4000>Gradient Glow
Zombified Font Available here
Open new 600x250
Open Paper6
Copy>Paste as New Layer
Click on background layer
Selections>Select All
New Raster Layer
Move to very top
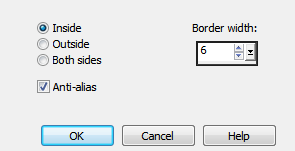
Selections>Modify>Select Selection Borders with following settings
Floodfill selected area with #3abdae
Selections>Modify>Expand by 4
New Raster Layer under first border layer
Floodfill black
Selections>Modify>Expand by 2
New Raster Layer under both border layers
Floodfill white
Selections>Select None
Merge all 3 border layers
On new border layer
Effects>DSB Flux>Bright Noise following settings
Copy>Paste as New Layer close up of tube
Resize by 50%
Position to far right side
Change blend mode to Luminance 100% opacity
Duplicate
Effects>Reflection Effects>Rotating Mirror with following settings
Copy>Paste as New Layer
Full size tube
Resize by 30%
Position in center
Copy>Paste as New Layer E70
Resize by 25%
Position in lower left hand corner
Copy>Paste as New Layer E32
Add credits
Add name
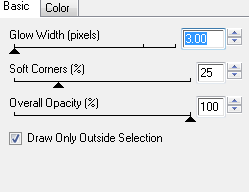
Gradient Glow with following settings
Gradient Glow again in black with following settings
Effects>3d Effects>Inner Bevel following settings
Add drop shadow with following settings
Hope you enjoy!
Monday, August 13, 2012
PTU Autumn Retreat Tutorial
Tutorial written by ©Stephanie Spriggs aka Stefani for use on http://swaggabystefani.blogspot.com. Any similarity to another tutorial is purely coincidental and unintentional. Please do NOT claim as your own. My tutorials are for personal use only, please do not use them for monetary gain. If you wish to share my tutorial please contact me at swaggabystefani@gmail.com first to obtain permission.
Supplies Needed
Annaica’s Place PTU Autumn Retreat Kit
Lady Mishka’s “Thanksgiving” tube which I received as a gift when she left the PSP world
WSL_Mask328 available in this pack
Font used is Digs My Hart
Xero Porcelain
Lets Get Started!!
Open New Image 650x650
Open Paper10
Copy>Paste as New Layer
Layers>Load/Save Mask>Load Mask From Disk
Choose your mask
Merge>Merge Group
Open tube
Copy Merged
Paste as New Layer
Resize by 75% and place to lower right of tag.
On tube Xero>Porcelain use default settings
Add drop shadow with following setting
Open Element 50
Copy>Paste As New Layer
Resize by 25%
Place beside tubes left foot
Add same drop shadow
Open Element 7
Copy>Paste As New Layer
Resize by 75%
Place to left of tag
Position under tube layer
Open Element 23
Copy>Paste As New Layer
Resize by 50%
Place in front of tree
Open Element 8
Copy>Paste As New Layer
Resize by 35%
Place next to tree
Add copyright
Add name
Digs My Hart Size 30
Any Orange Color
Gradient Glow with following settings
Do this twice with 2 different colors
Position name where you want it.
Tuesday, May 22, 2012
Woah have I been busy!
So since my last post {which was waaaaaaaaaaay to long ago!} I have gotten my GED, started beauty school, been told I am a horrible neglectful mother and that my mother in law is taking me to court for custody of my daughter, then she preceded to kick me out. I had to miss school so I could get all mine and my daughters stuff out of her house in 1 day. Plus on top of all of this my husband is moving to Georgia end of June and the baby and I won't be going with him until March of next year at the earliest. 5 years I been with my husband and have NEVER been that far away from him. Never more then a couple blocks. I don't know what I'm going to do or how I'm going to handle it. O and I am participating in Tagging Idol with PTE to keep my mind off things so wish me luck with that! Ill try to have some new tutorials and kits out soon. Maybe I'll even throw a few freebies in there =D
Wednesday, April 18, 2012
Now selling at 2 stores!!
I am VERY excited to announce that I am now selling at not 1 but 2 stores!!
WhisprdDesignz and The Scrappers Den!
Both are having a designer call so check out the banners below for more info!!
WhisprdDesignz and The Scrappers Den!
Both are having a designer call so check out the banners below for more info!!
WhisprdDesignz^
Monday, April 16, 2012
First PTU Kit is now for sale!!
I will now be selling kits!! I am so happy and it's happening so fast!! I have my first kit "LollyPop Dreams" for sale at Whisprd Designz and more to come. Click the preview to head over and buy it!!
Friday, April 13, 2012
First Tag With My FTU Kit!!
Here is a tag made using my FTU mini kit. Thank you Shelli I think you did an amazing job!!
I can't wait to see what else everyone comes up with! I am very happy to see my mini kit is usable!!
PTU Rock The Nite Simple Tut
Tutorial written by ©Stephanie Spriggs aka Stefani for use on http://swaggabystefani.blogspot.com. Any similarity to another tutorial is purely coincidental and unintentional. Please do NOT claim as your own. My tutorials are for personal use only, please do not use them for monetary gain. If you wish to share my tutorial please contact me at swaggabystefani@gmail.com first to obtain permission.
Supplies Needed
Annaica’s Place PTU Rock The Nite Kit
Font used is “Nervous” available at dafont.com
Noise
Gradient Glow
This is going to be a real simple but super cute tutorial.
First we are going to open AP_RocktheNiteELEMENT53.
Next we are going to open AP_RocktheNiteELEMENT46 and AP_RocktheNiteELEMENT47.
Copy and Paste both as new layers onto AP_RocktheNiteELEMENT53.
Place both in front of the frame
Next select the inside of the frame > invert
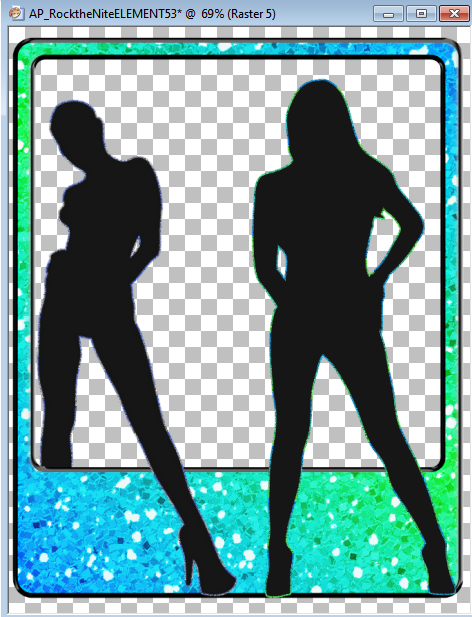
Click on AP_RocktheNiteElement46 and erase her left leg
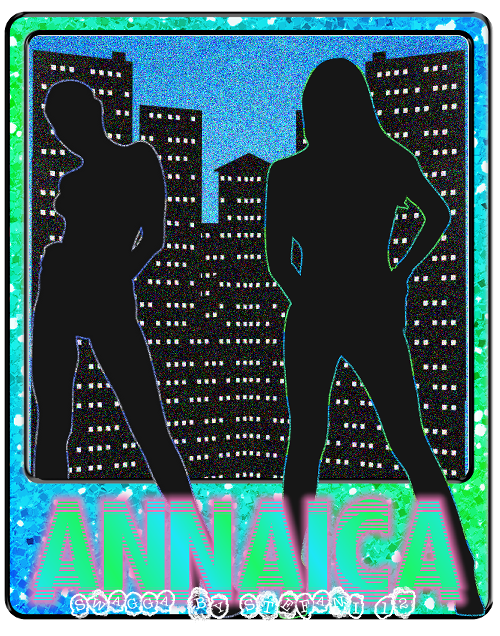
It should look like this
Keep the inside of the frame selected.
Open Paper 6
Copy > Paste As New Layer
Delete
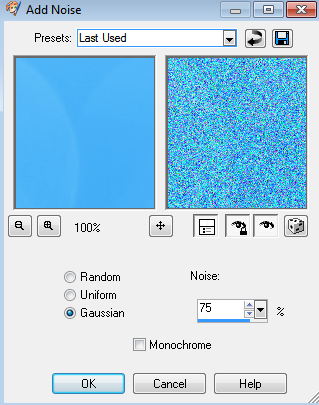
Adjust > Add/Remove Noise > Add Noise with following settings
Now open AP_RocktheNiteELEMENT1
Copy > Paste As New Layer
Add Noise with following settings
Duplicate
Place one at the top part behind the frame
Use the duplicate to cover the bottom part.
Add your credits
Add Name
Add Gradient Glow with following settings
Resize entire image to
500x636
Hope you enjoyed!!
Preview of First PTU Scrapkit!!
I would like to present to you a preview of my first PTU Scrap Kit
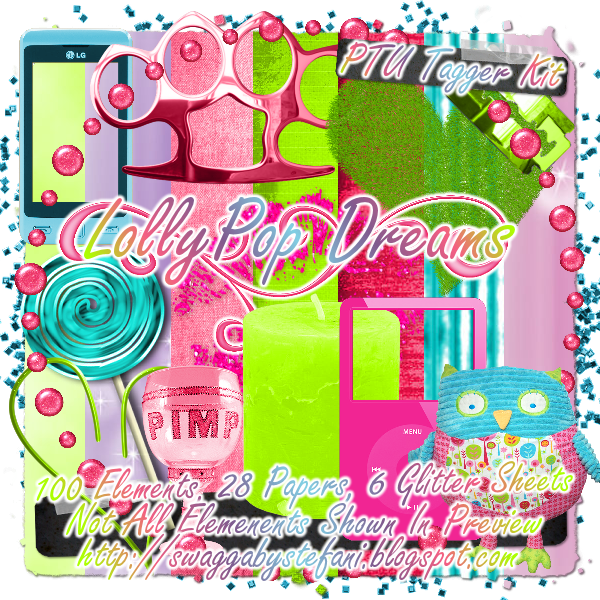
I was inspired by LadyMishka's PFD Prepaid Lollypop

I was inspired by LadyMishka's PFD Prepaid Lollypop
As of right now I am not selling at any stores but have applied. If any of you know of any doing designer calls please let me know! I can't wait to start selling my kits!! I hope you enjoy the preview. Keep an eye out because I will update as soon as it's available for purchase!
Thursday, April 12, 2012
You don't wanna miss this!
Click the tab above that to take you to Lady Mishka PSP Tubes to Purchase The Following
All grabbags are available in CU and PU. Please make sure when purchasing you purchase the correct one for your intended use of the elements.
Lady Mishka also has 2 new tubes available on her new site
And lets not forget about her prepaid project!! What a beauty! I can't wait to see her finished!
Lady Mishka is still selling at PFD as well so make sure to stop by there and check her stuff out. She also has a new Prepaid Project there
So make sure you stop by and check out her work. Once again the tabs at the top will take you to her new store AND her PFD page =D
Tuesday, April 10, 2012
FTU "Girls Do It Better"
I have FINALLY made my first kit. This is a mini kit including 6 papers and 15 elements. I made it for a contest at The Emo Chicks PSP. I am offering it as a FTU kit here on my blog. I hope everyone enjoys. Please remember if you use my work in tutorials that you email me at swaggabystefani@gmail.com first to obtain permission. This goes for groups as well. If you want to use my kit in a challenge please email me to obtain permission. Anyways off to the good stuff! Click the preview to download.
Just an FYI if you are simply snagging without intent to tut my kit or use it as a challenge you do NOT have to ask permission. Just simply leave a nice little thank you, snagged, or anything to let me know you downloaded. If in the future you decide you want to use it in a tut or challenge then you WILL need to obtain permission. I hope this all makes sense. =/
Just an FYI if you are simply snagging without intent to tut my kit or use it as a challenge you do NOT have to ask permission. Just simply leave a nice little thank you, snagged, or anything to let me know you downloaded. If in the future you decide you want to use it in a tut or challenge then you WILL need to obtain permission. I hope this all makes sense. =/
Sunday, April 8, 2012
Everybody's Fool Animated Tutorial
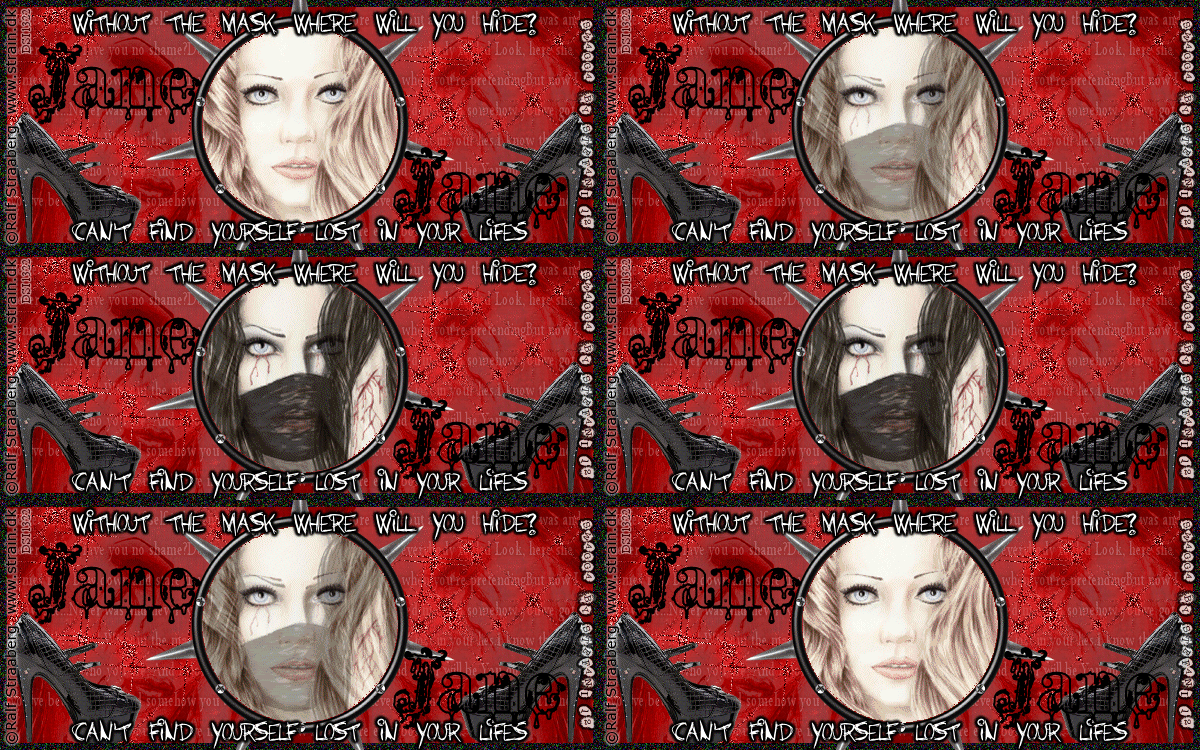
Tutorial written by ©Stephanie Spriggs aka Stefani for use on http://swaggabystefani.blogspot.com. Any similarity to another tutorial is purely coincidental and unintentional. Please do NOT claim as your own. My tutorials are for personal use only, please do not use them for monetary gain. If you wish to share my tutorial please contact me at swaggabystefani@gmail.com first to obtain permission.
Supplies Needed
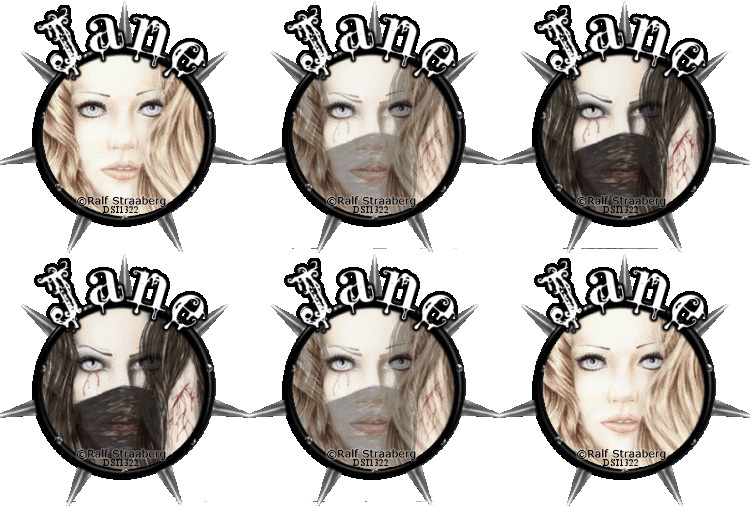
For this tutorial you will need 3 tubes. The tubes I am using are all by Ralf Straaberg. For the animation I am using “Priceless Piece of Art” and “Masked Pain”. For the background I will be using “Selling The Drama” Available at Dreamscape Imaging
FTU “School Of Rock” colab kit, We will be using Abstracts part. Available for download here
Font used is “Barbies Jalous Sisters” available at dafont.com
Animation Shop
We will start with the main banner. First open a canvas of 600x250.
Open p03 from the papers.
Copy > Paste as New Layer in the 600x250 canvas
Now we are going to take “Selling The Drama”
Copy > Paste As New Layer
Resize to 400x167
Place on left side making sure the top of her head meets the top of the banner
Duplicate > Mirror
Change blend mode to luminance at 25% for both
Now take the overlay I provided
Paste as new layer
Open RedSparkles
Copy > Paste as New Layer
Go back to the main layer
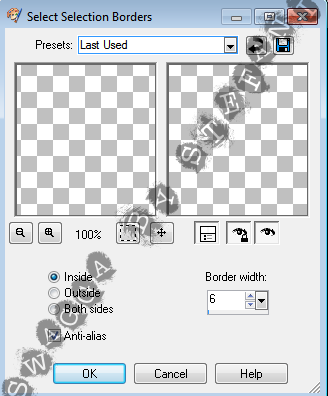
Select all > Selections > Modify> Select Selection Border
Using the following settings
Next make new raster layer
Flood fill black
Select none
Open BlackShoe
Resize by 50%
Move to lower left hand corner
Duplicate > Mirror
Now open frame1
Copy > Paste as new layer
Resize by 58%
Make sure frame is centered
Add your text
Add your credits
Add name
Now we are going to start the morphing animation.
Open “Masked Pain” and “Priceless Piece Of Art”
Now we are going to Paste as New Layer “Masked Pain” over “Priceless Piece Of Art”
Lower the opacity to 50% so you can match the tubes up properly.
Now we are going to crop out the parts we don’t need.
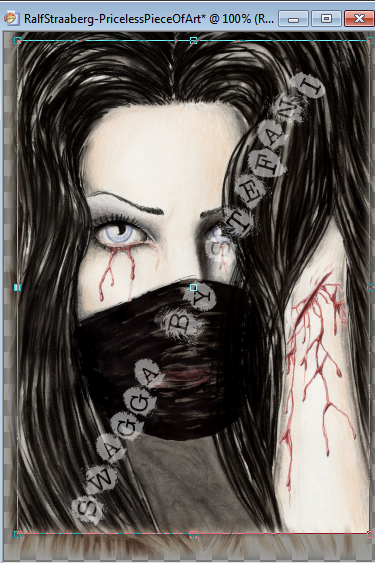
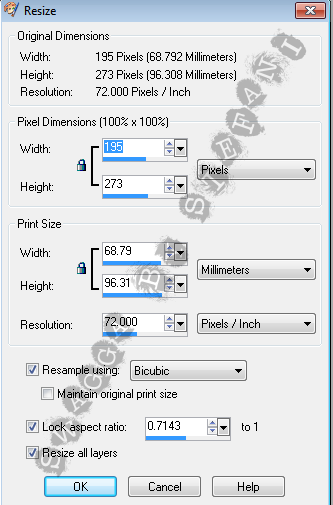
Use the following setting to resize
Now we want the dark haired girl to be the end of the animation so we will start with her on top. We are going to copy merged with her on top at 100% opacity.
You will do this in 10% increments until the top girl is at 0%
When you paste them into the banner they should go straight to the middle. All you have to do is make sure the frame is over them all.
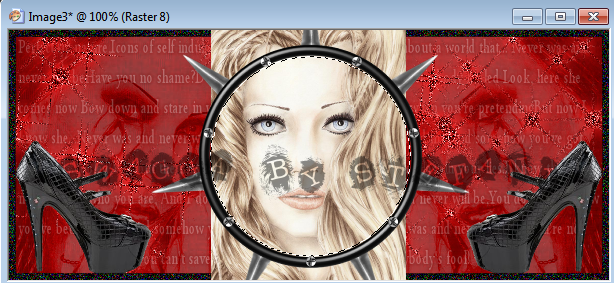
Now we select the inside of the frame
This is what you should have. However, I havent added my text, credits, or name yet.
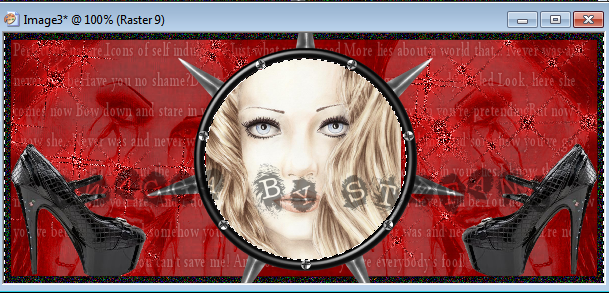
Now you are going to invert > delete for each tube layer of the morph
So you should end up with this
Select None
Now for animating.
Open AS
Starting with the top tube layer copy merged > paste as new animation
Close off top layer Copy Merged > Paste After Current Frame
Do this until all frames are pasted.
Remember to close off each frame as you do it!
One you have all frames posted Edit > Select All
Duplicate Selected
Go back and Select the 2nd set of frames (from the blonde girl to the end)
Animation > Reverse Frames
Animation > Frame Properties
Change to 20
View animation to make sure its how you want it.
I hope you enjoyed my tutorial!
Tuesday, March 20, 2012
PTU Magic Amanda Tutorial
 Tutorial written by ©Stephanie Spriggs aka Stefani for use on http://swaggabystefani.blogspot.com. Any similarity to another tutorial is purely coincidental and unintentional. Please do NOT claim as your own. My tutorials are for personal use only, please do not use them for monetary gain. If you wish to share my tutorial please contact me at swaggabystefani@gmail.com first to obtain permission.
Supplies Needed
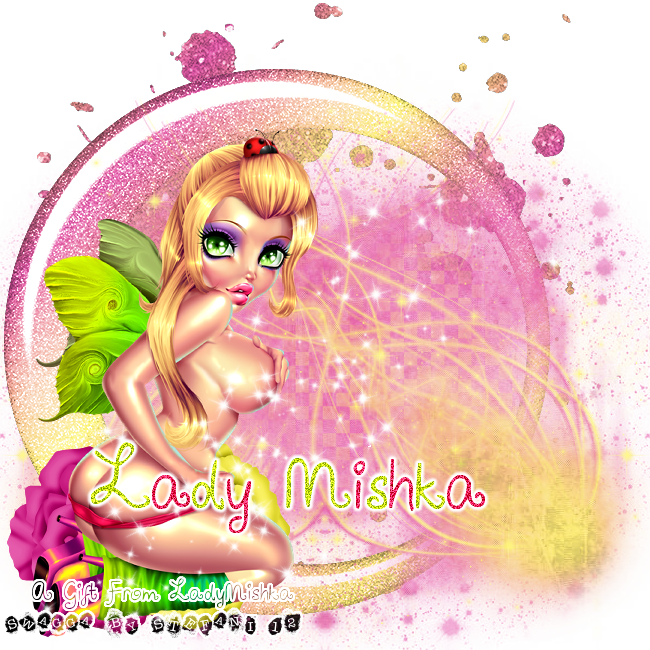
“Amanda” tube from LadyMishka. Available for purchase at Pics For Design. Was given to me as a gift from LadyMishka however so my copyright will be different then if tube was purchased.
PTU Alikas Scraps “Totally Zirconia” Kit available for purchase at many stores. Here is the link to it on her blog =D
LD_Sparkle_1 and LD_Sparkle_2 from Linda contribution to Creative Misfits Sparkle Mask pack found here.
Font Airplanes In The Night Sky available at dafont.com
Eye Candy 4000 Gradient Glow
Open 650x650
Open as_Paper07
Copy > Paste As New Layer
Layers > Load/Save Mask > Load Mask From Disk
Choose Mask LD_Sparkle_1 > Load
Go To Group Layer
Right Click > Merge > Merge Group
Open as_Paper06
Copy > Paste As New Layer
Layers > Load/Save Mask > Load Mask From Disk
Go To Group Layer
Right Click > Merge > Merge Group
Merge Down
Move Mask Layer To Lower Left
Duplicate > Mirror
Open “Amanda” tube
Close Off All But Wings And Tube Layers
Copy Merged
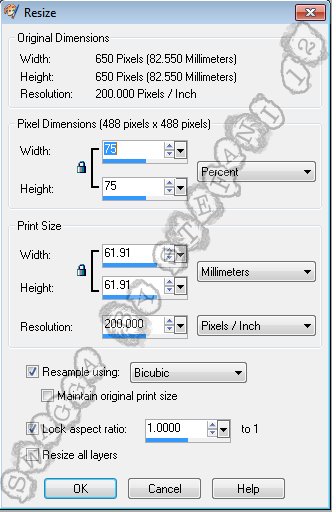
Paste As New Layer
Image > Resize With Following Settings
Mirror
Place In Lower Left
Open as18
Place On Left Side Under “Amanda”
Place The Right Side Mask Layer Above as18
Open as10 and as11
Copy > Paste As New Layer
For Both
Place Under “Amanda” As If She Is Sitting On Them
Open as30
Place Under All Layers
Put Where You Like It Best
Open as60
Copy > Paste As New Layer
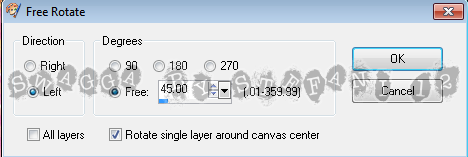
Image > Rotate > Free Rotate
With Following Settings
Place Over “Amanda”
Add Credits
Add Name
Selections > As Vector Object
Color Every Other Letter Green
Color Remaining Letters Pink
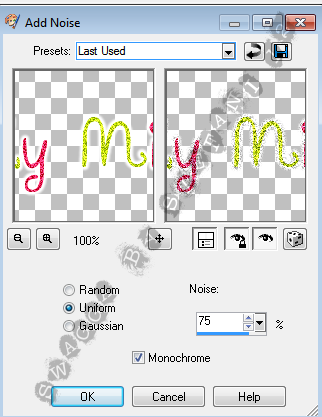
Adjust > Add/Remove Noise > Add Noise
Following Settings
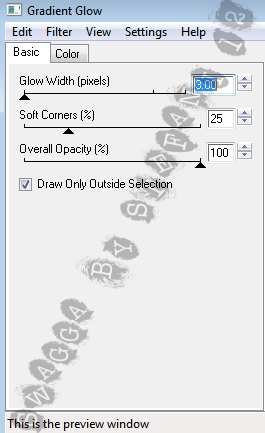
Effects > Eye Candy 4000 > Gradient Glow
Following Settings x2
Friday, February 24, 2012
Finally an update! I have lost a CT position. I believe the reasoning behind me losing it was wrong on their part but I will not get any farther into it. However, I have gotten a new CT position with Crys' Creative Scraps. I have been trying to post her blinkie since last night but blogger apparently doesn't want me to yet lol. I will have that up as soon as blogger allows. I will also have a new tutorial up either today or tomorrow. I just want to thank everyone who reads my blogs, tries out my tutorials, and are just my friends. Thank you. Without you I wouldn't be who I am or be able to do what I do. =D
Thursday, January 19, 2012
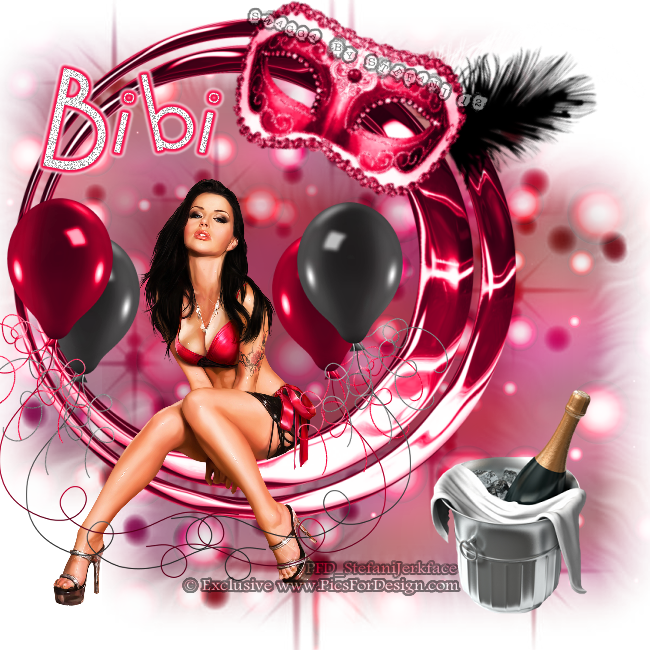
Party Girl PTU Tutorial
Tutorial written by ©Stephanie Spriggs aka Swagga By Stefani for use on http://swaggabystefani.blogspot.com. Any similarity to another tutorial is purely coincidental and unintentional. Please do NOT claim as your own. My tutorials are for personal use only, please do not use them for monetary gain. If you wish to share my tutorial please contact me at swaggabystefani@gmail.com first to obtain permission.
Supplies Needed
Melissa Exclusive VeryMany Tube Available at Pics For Design
PTU Happy 2012 Kit by Bibi’s Collection available at The PSP Project
Aqua’s Mask AR315_CMC_Mask145 available on Creative Misfits Creations
Cocktail Bubbly font available at dafont.com
Open 650x650
Open Paper (6)
Copy > Paste As New Layer
Layers > Load/Save Mask > Load Mask From Disk
Choose Mask > Load
Go To Group Layer
Right Click > Merge > Merge Group
Move To Upper Left
Duplicate And Move To Lower Right
Open (25)
Copy > Paste As New Layer
Position Top Left
Open Tube
Select Red Layer > Copy Merged > Paste As New Layer
Resize by 30%
Position So She Is Sitting On Frame
Open (1)
Copy > Paste As New Layer
Resize by 75%
Position Lower Right
Open (2) and (3)
Copy > Paste As New Layer
Resize Both By 75%
Position Black Balloon To Left Of Tube
Position Pink Balloon Slightly Above
Duplicate And Mirror Both
Position To Right Of Tube With Pink Balloon Under Black Balloon
Open (45)
Copy > Paste As New Layer
Image > Rotate > Free Rotate 45* Right
Place Top Right Corner
Add Credits
Add Name
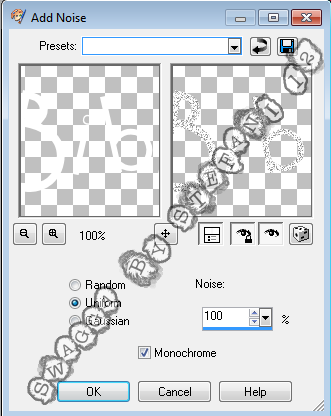
Adjust > Add/Remove Noise > Add Noise
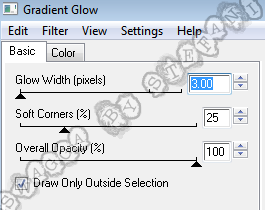
Add Pink Gradient Glow 2 Times With Following Settings
Add White Gradient Glow Once With Same Settings
Wednesday, January 18, 2012
Taking Back PSP
Hello all! I will be taking part in a wonderful event called Taking Back PSP.
What is Taking Back PSP? Well here is a description from there blog. You can visit their blog by clicking the graphic above.
"Taking Back PSP is a community event designed to bring taggers together for a fun evening, and at the same time raise funds for Pink Ribbon.org - an international organization focused on breast cancer research -- something that has affected each of us in one capacity or another.
Join us at the end of March, when we will hold a one time event, where attendees will have access to a TON of exclusive tubes, scrapkits, CU items --- and win door prizes including gift certificates, tubes, and other wonderful things.
Your event ticket will cost you a meer $10.00 - ALL of which will be donated to PinkRibbon.org."
There will be tons of exclusive items, awesome door prizes, and I will be contributing my first ever scrapkit! All of the items available at the event are completely exclusive to the even so you don't wanna miss out!
Sunday, January 15, 2012
Another Forum Set Show Off!
I made this today for a contest at Pimpin PSPers. If your not a member yet what are you waiting for? Lol
Anyways I was really proud of it so I decided I would post it on here to show it off. I used "Everybody's Fool" by Evanescence for my inspiration.

Anyways I was really proud of it so I decided I would post it on here to show it off. I used "Everybody's Fool" by Evanescence for my inspiration.


Subscribe to:
Comments (Atom)


