


Thursday, September 6, 2012
PTU Marry The Night

Tutorial written by ©Stephanie Spriggs aka Stefani for use on http://swaggabystefani.blogspot.com. Any similarity to another tutorial is purely coincidental and unintentional. Please do NOT claim as your own. My tutorials are for personal use only, please do not use them for monetary gain. If you wish to share my tutorial please contact me at swaggabystefani@gmail.com first to obtain permission.
Supplies Needed
New release from Foto Retro “Alana” available at Artistic Reality Talent on 9/7
PTU “Marry The Night” By KillerKitty Scraps
WSL_Mask221 available here
Font “Broken Ghost” at dafont.com
Open Paper 4
Resize to 600x600
Layers>Load/Save Mask
Load Mask from disk
WSL_Mask221
Merge group
Open Sparkles
Resize to 600x530
Copy>Paste as New Layer
Add drop shadow
Copy>Paste tube
Resize by 75%
Position tube to far right
Add drop shadow
Position sparkle layer to look like its wrapping around tube
Selections>Float>Defloat tube
On sparkle layer delete areas to give the effect of it swirling around tube
Copy>Paste Broken Glass
Resize by 75%
Add drop shadow
Open Cat1 and Cat2
Resize both by 50%
Place Cat1 by tubes feet
Cat2 to the right of the tag
Add drop shadow to both
Open Moongem 1
Resize by 50%
Flip Vertical and Horizontal
Copy>Paste
Position top right
Add drop shadow
Add Credits
Add Name
Add Gradient Glow at 8
Add Noise 80% Uniform Monochrome Checked
Hope you enjoyed!!


Thursday, August 30, 2012
PTU EDC Tutorial
Tutorial written by ©Stephanie Spriggs aka Stefani for use on http://swaggabystefani.blogspot.com. Any similarity to another tutorial is purely coincidental and unintentional. Please do NOT claim as your own. My tutorials are for personal use only, please do not use them for monetary gain. If you wish to share my tutorial please contact me at swaggabystefani@gmail.com first to obtain permission.
Supplies Needed
PTU Kit “Funky Music” by Abstract Creations available at Artistic Reality Talent
“EDC” by Scott See You need a license with Artistic Reality Talent to use his work. Tube available here
DBSflux>Bright Noise available here
Eyecandy 4000>Gradient Glow
Zombified Font Available here
Open new 600x250
Open Paper6
Copy>Paste as New Layer
Click on background layer
Selections>Select All
New Raster Layer
Move to very top
Selections>Modify>Select Selection Borders with following settings
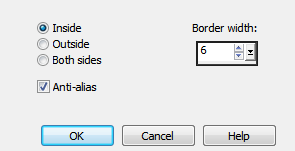
Floodfill selected area with #3abdae
Selections>Modify>Expand by 4
New Raster Layer under first border layer
Floodfill black
Selections>Modify>Expand by 2
New Raster Layer under both border layers
Floodfill white
Selections>Select None
Merge all 3 border layers
On new border layer
Effects>DSB Flux>Bright Noise following settings

Copy>Paste as New Layer close up of tube
Resize by 50%
Position to far right side
Change blend mode to Luminance 100% opacity
Duplicate
Effects>Reflection Effects>Rotating Mirror with following settings

Copy>Paste as New Layer
Full size tube
Resize by 30%
Position in center
Copy>Paste as New Layer E70
Resize by 25%
Position in lower left hand corner
Copy>Paste as New Layer E32
Add credits
Add name
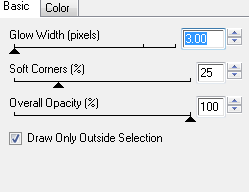
Gradient Glow with following settings

Gradient Glow again in black with following settings
Effects>3d Effects>Inner Bevel following settings

Add drop shadow with following settings

Hope you enjoy!
Monday, August 13, 2012
PTU Autumn Retreat Tutorial

Tutorial written by ©Stephanie Spriggs aka Stefani for use on http://swaggabystefani.blogspot.com. Any similarity to another tutorial is purely coincidental and unintentional. Please do NOT claim as your own. My tutorials are for personal use only, please do not use them for monetary gain. If you wish to share my tutorial please contact me at swaggabystefani@gmail.com first to obtain permission.
Supplies Needed
Annaica’s Place PTU Autumn Retreat Kit
Lady Mishka’s “Thanksgiving” tube which I received as a gift when she left the PSP world
WSL_Mask328 available in this pack
Font used is Digs My Hart
Xero Porcelain
Lets Get Started!!
Open New Image 650x650
Open Paper10
Copy>Paste as New Layer
Layers>Load/Save Mask>Load Mask From Disk
Choose your mask
Merge>Merge Group
Open tube
Copy Merged
Paste as New Layer
Resize by 75% and place to lower right of tag.
On tube Xero>Porcelain use default settings
Add drop shadow with following setting

Open Element 50
Copy>Paste As New Layer
Resize by 25%
Place beside tubes left foot
Add same drop shadow
Open Element 7
Copy>Paste As New Layer
Resize by 75%
Place to left of tag
Position under tube layer
Open Element 23
Copy>Paste As New Layer
Resize by 50%
Place in front of tree
Open Element 8
Copy>Paste As New Layer
Resize by 35%
Place next to tree
Add copyright
Add name
Digs My Hart Size 30
Any Orange Color
Gradient Glow with following settings

Do this twice with 2 different colors
Position name where you want it.
Hope you enjoyed!!
Tuesday, May 22, 2012
Woah have I been busy!
So since my last post {which was waaaaaaaaaaay to long ago!} I have gotten my GED, started beauty school, been told I am a horrible neglectful mother and that my mother in law is taking me to court for custody of my daughter, then she preceded to kick me out. I had to miss school so I could get all mine and my daughters stuff out of her house in 1 day. Plus on top of all of this my husband is moving to Georgia end of June and the baby and I won't be going with him until March of next year at the earliest. 5 years I been with my husband and have NEVER been that far away from him. Never more then a couple blocks. I don't know what I'm going to do or how I'm going to handle it. O and I am participating in Tagging Idol with PTE to keep my mind off things so wish me luck with that! Ill try to have some new tutorials and kits out soon. Maybe I'll even throw a few freebies in there =D
Wednesday, April 18, 2012
Now selling at 2 stores!!
I am VERY excited to announce that I am now selling at not 1 but 2 stores!!
WhisprdDesignz and The Scrappers Den!
Both are having a designer call so check out the banners below for more info!!


WhisprdDesignz and The Scrappers Den!
Both are having a designer call so check out the banners below for more info!!
WhisprdDesignz^
Monday, April 16, 2012
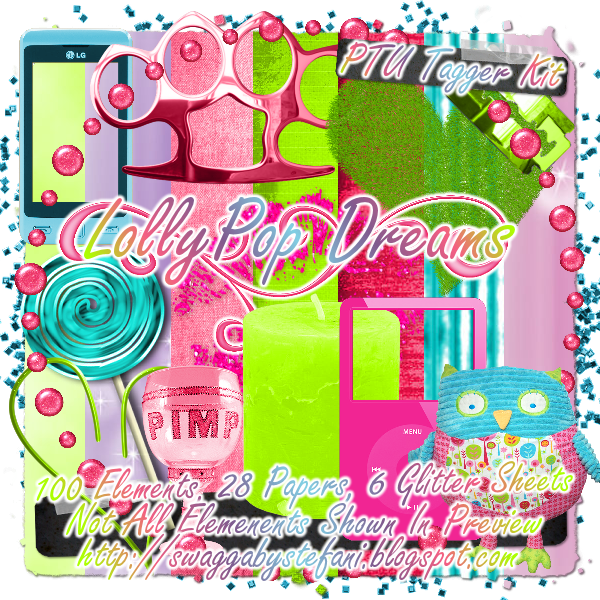
First PTU Kit is now for sale!!
I will now be selling kits!! I am so happy and it's happening so fast!! I have my first kit "LollyPop Dreams" for sale at Whisprd Designz and more to come. Click the preview to head over and buy it!!
Friday, April 13, 2012
First Tag With My FTU Kit!!

Here is a tag made using my FTU mini kit. Thank you Shelli I think you did an amazing job!!
I can't wait to see what else everyone comes up with! I am very happy to see my mini kit is usable!!
PTU Rock The Nite Simple Tut

Tutorial written by ©Stephanie Spriggs aka Stefani for use on http://swaggabystefani.blogspot.com. Any similarity to another tutorial is purely coincidental and unintentional. Please do NOT claim as your own. My tutorials are for personal use only, please do not use them for monetary gain. If you wish to share my tutorial please contact me at swaggabystefani@gmail.com first to obtain permission.
Supplies Needed
Annaica’s Place PTU Rock The Nite Kit
Font used is “Nervous” available at dafont.com
Noise
Gradient Glow
This is going to be a real simple but super cute tutorial.
First we are going to open AP_RocktheNiteELEMENT53.
Next we are going to open AP_RocktheNiteELEMENT46 and AP_RocktheNiteELEMENT47.
Copy and Paste both as new layers onto AP_RocktheNiteELEMENT53.
Place both in front of the frame
Next select the inside of the frame > invert
Click on AP_RocktheNiteElement46 and erase her left leg
It should look like this

Keep the inside of the frame selected.
Open Paper 6
Copy > Paste As New Layer
Delete
Adjust > Add/Remove Noise > Add Noise with following settings

Now open AP_RocktheNiteELEMENT1
Copy > Paste As New Layer
Add Noise with following settings

Duplicate
Place one at the top part behind the frame
Use the duplicate to cover the bottom part.
Add your credits
Add Name
Add Gradient Glow with following settings

Resize entire image to
500x636
Hope you enjoyed!!
Preview of First PTU Scrapkit!!
I would like to present to you a preview of my first PTU Scrap Kit
I was inspired by LadyMishka's PFD Prepaid Lollypop
 .
.

I was inspired by LadyMishka's PFD Prepaid Lollypop
.As of right now I am not selling at any stores but have applied. If any of you know of any doing designer calls please let me know! I can't wait to start selling my kits!! I hope you enjoy the preview. Keep an eye out because I will update as soon as it's available for purchase!
Thursday, April 12, 2012
You don't wanna miss this!
Click the tab above that to take you to Lady Mishka PSP Tubes to Purchase The Following


All grabbags are available in CU and PU. Please make sure when purchasing you purchase the correct one for your intended use of the elements.
Lady Mishka also has 2 new tubes available on her new site


And lets not forget about her prepaid project!! What a beauty! I can't wait to see her finished!

Lady Mishka is still selling at PFD as well so make sure to stop by there and check her stuff out. She also has a new Prepaid Project there
So make sure you stop by and check out her work. Once again the tabs at the top will take you to her new store AND her PFD page =D
Subscribe to:
Posts (Atom)
My Copyright Protection
