


Thursday, August 30, 2012
PTU EDC Tutorial
Tutorial written by ©Stephanie Spriggs aka Stefani for use on http://swaggabystefani.blogspot.com. Any similarity to another tutorial is purely coincidental and unintentional. Please do NOT claim as your own. My tutorials are for personal use only, please do not use them for monetary gain. If you wish to share my tutorial please contact me at swaggabystefani@gmail.com first to obtain permission.
Supplies Needed
PTU Kit “Funky Music” by Abstract Creations available at Artistic Reality Talent
“EDC” by Scott See You need a license with Artistic Reality Talent to use his work. Tube available here
DBSflux>Bright Noise available here
Eyecandy 4000>Gradient Glow
Zombified Font Available here
Open new 600x250
Open Paper6
Copy>Paste as New Layer
Click on background layer
Selections>Select All
New Raster Layer
Move to very top
Selections>Modify>Select Selection Borders with following settings
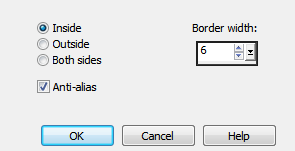
Floodfill selected area with #3abdae
Selections>Modify>Expand by 4
New Raster Layer under first border layer
Floodfill black
Selections>Modify>Expand by 2
New Raster Layer under both border layers
Floodfill white
Selections>Select None
Merge all 3 border layers
On new border layer
Effects>DSB Flux>Bright Noise following settings

Copy>Paste as New Layer close up of tube
Resize by 50%
Position to far right side
Change blend mode to Luminance 100% opacity
Duplicate
Effects>Reflection Effects>Rotating Mirror with following settings

Copy>Paste as New Layer
Full size tube
Resize by 30%
Position in center
Copy>Paste as New Layer E70
Resize by 25%
Position in lower left hand corner
Copy>Paste as New Layer E32
Add credits
Add name
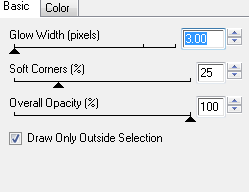
Gradient Glow with following settings

Gradient Glow again in black with following settings
Effects>3d Effects>Inner Bevel following settings

Add drop shadow with following settings

Hope you enjoy!

Monday, August 13, 2012
PTU Autumn Retreat Tutorial

Tutorial written by ©Stephanie Spriggs aka Stefani for use on http://swaggabystefani.blogspot.com. Any similarity to another tutorial is purely coincidental and unintentional. Please do NOT claim as your own. My tutorials are for personal use only, please do not use them for monetary gain. If you wish to share my tutorial please contact me at swaggabystefani@gmail.com first to obtain permission.
Supplies Needed
Annaica’s Place PTU Autumn Retreat Kit
Lady Mishka’s “Thanksgiving” tube which I received as a gift when she left the PSP world
WSL_Mask328 available in this pack
Font used is Digs My Hart
Xero Porcelain
Lets Get Started!!
Open New Image 650x650
Open Paper10
Copy>Paste as New Layer
Layers>Load/Save Mask>Load Mask From Disk
Choose your mask
Merge>Merge Group
Open tube
Copy Merged
Paste as New Layer
Resize by 75% and place to lower right of tag.
On tube Xero>Porcelain use default settings
Add drop shadow with following setting

Open Element 50
Copy>Paste As New Layer
Resize by 25%
Place beside tubes left foot
Add same drop shadow
Open Element 7
Copy>Paste As New Layer
Resize by 75%
Place to left of tag
Position under tube layer
Open Element 23
Copy>Paste As New Layer
Resize by 50%
Place in front of tree
Open Element 8
Copy>Paste As New Layer
Resize by 35%
Place next to tree
Add copyright
Add name
Digs My Hart Size 30
Any Orange Color
Gradient Glow with following settings

Do this twice with 2 different colors
Position name where you want it.
Hope you enjoyed!!

Subscribe to:
Posts (Atom)
My Copyright Protection

